Difference between revisions of "How to make mods"
| Line 1: | Line 1: | ||
'''Welcome to modding for Bergsbruk!''' our goal has been to make this as easy as possible to add your own stuff, but remember you can only make stuff you legaly have '''ALL''' rights to (And you cant sell mods). '''Good Luck!''' | '''Welcome to modding for Bergsbruk!''' our goal has been to make this as easy as possible to add your own stuff, but remember you can only make stuff you legaly have '''ALL''' rights to (And you cant sell mods). '''Good Luck!''' | ||
== | == Required Software == | ||
'''Required Tools:''' | '''Required Tools:''' | ||
*'''''Unreal Engine 4.27''''' Free to use with a creators license '''Link:'''https://www.unrealengine.com/en-US/eulacheck/creators | *'''''Unreal Engine 4.27''''' Free to use with a creators license '''Link:'''https://www.unrealengine.com/en-US/eulacheck/creators | ||
Revision as of 10:22, 5 November 2021
Welcome to modding for Bergsbruk! our goal has been to make this as easy as possible to add your own stuff, but remember you can only make stuff you legaly have ALL rights to (And you cant sell mods). Good Luck!
Required Software
Required Tools:
- Unreal Engine 4.27 Free to use with a creators license Link:https://www.unrealengine.com/en-US/eulacheck/creators
- Blender Free to use 3D modeling software Link: https://www.blender.org/download/
- Example Project Needed as a base for the mods Link: https://drive.google.com/file/d/1Yy_L_WdwqxzAxYoRbHfHny8U0FitVjGE/view?usp=sharing
Optional Tools:
- Substance Painter Expensive texturing software Link: https://store.steampowered.com/app/1454900/Substance_3D_Painter_2021
Creating a Asset for Bergsbruk:
- Modeling in Blender for Bergsbruk
- Texturing Assets for Bergsbruk
- Importing to Unreal Engine
- Making a new Building
- Making a new Vehicle
- Making a new Vehicle Addon
- Making a new Vehicle Attachement
- Export and Upload your Mod
Modeling
Modeling for Bergsbruk is the same as for most games, with 2k-400k polys is recommended as anything above 400K gets tough for lowend users.
Mods in Bergsbruk are "encrypted" (not open to edit like FS) that way only the person with the mod project files can make edits, that also makes most bought models "legal" to use.
Any 3D software that support FBX export can be used but we recommend Blender.
Fillplanes
All dirt moving Machinery/Attachements need 8 Fillplanes that range from 0 to 100% full and a Dirt Cut Edge that looks like the one in the pic but match the bucket or blade.
Dumpers & Trucks and other stuff that transport dirt only need 8 Fillplanes that range from 0 to 100% full
Loaders & Excavators that only have attachers do not need Fillplanes or the Dirt Cut Edge
The Fillplane for the dozer, this is the 100% (full blade) one visible, Under this there are one fillplane at 10%, 20%, 30%, 40%, 50%, 60%, 80%, Making it 8 fillplanes in total.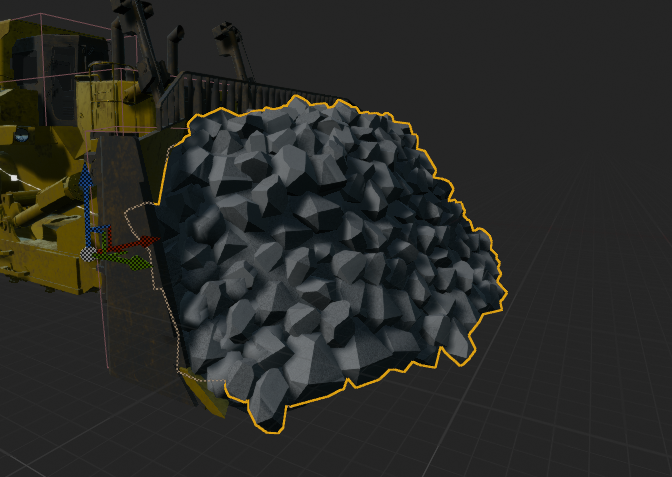
Rigging
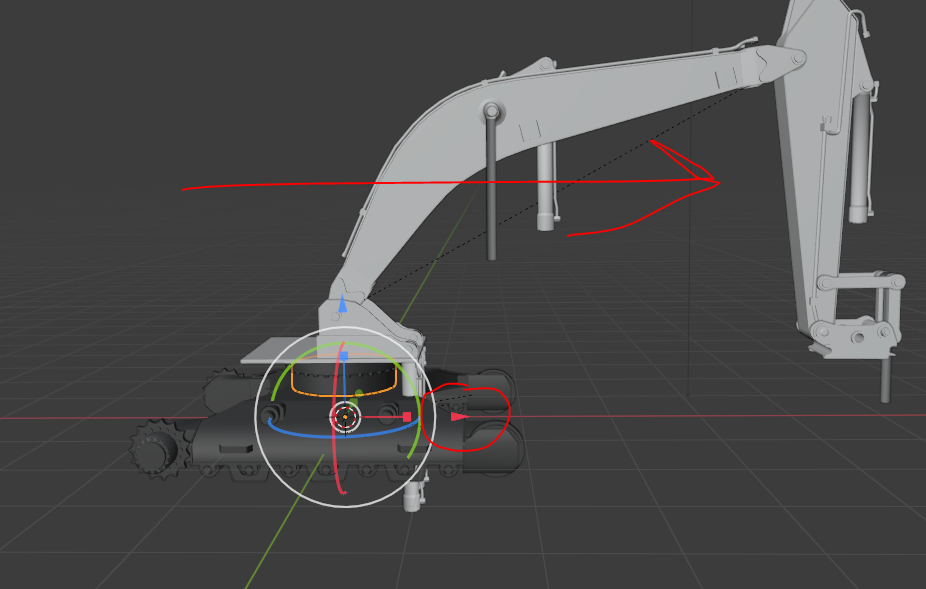
Make sure your vehicle or anything is facing this direction along the X axis (or it will be super wierd)
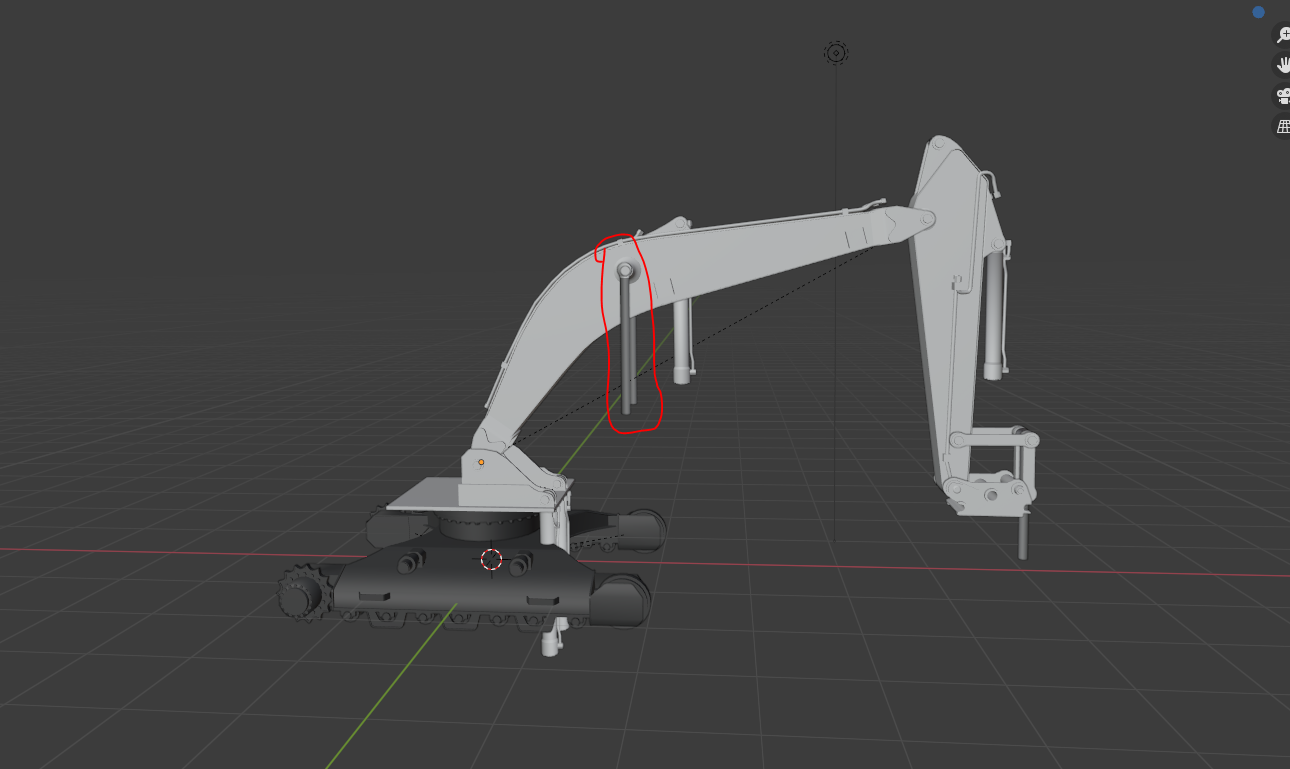
All moving parts that just will "Follow" Should point 90 degrees downward, as this will make setting it up in Unreal alot easier
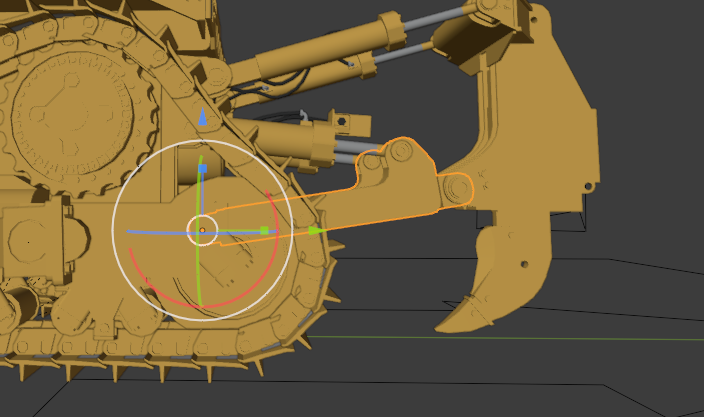
All your moving parts need to be 100% centered on the axis it should rotate/move around
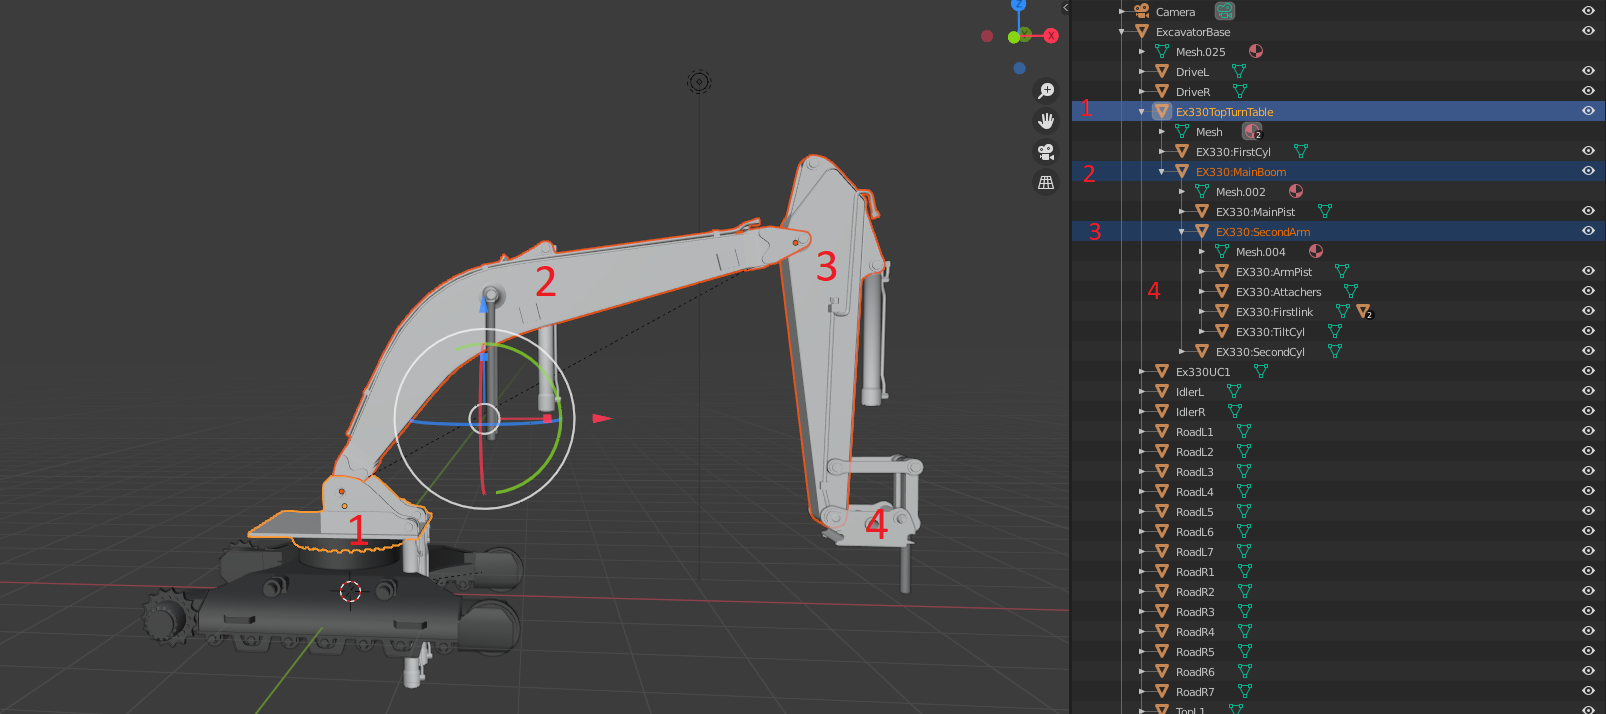
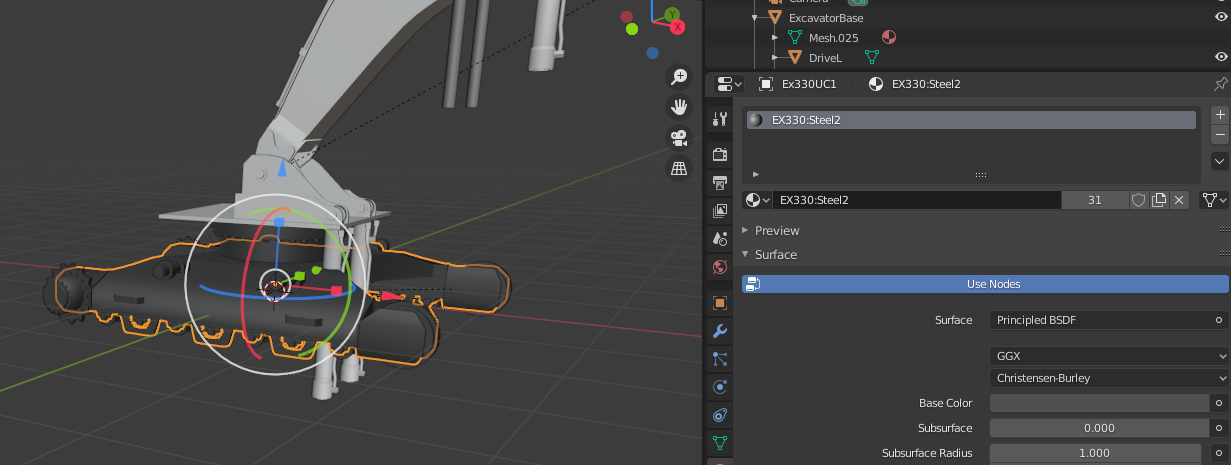
Rigging is done by having the chassie (where the wheels/engine are mounted) and the rest of the parts as "children" in a chain out from the Chassies
Remember to Assign materials to all parts, You need to use one material for each colour
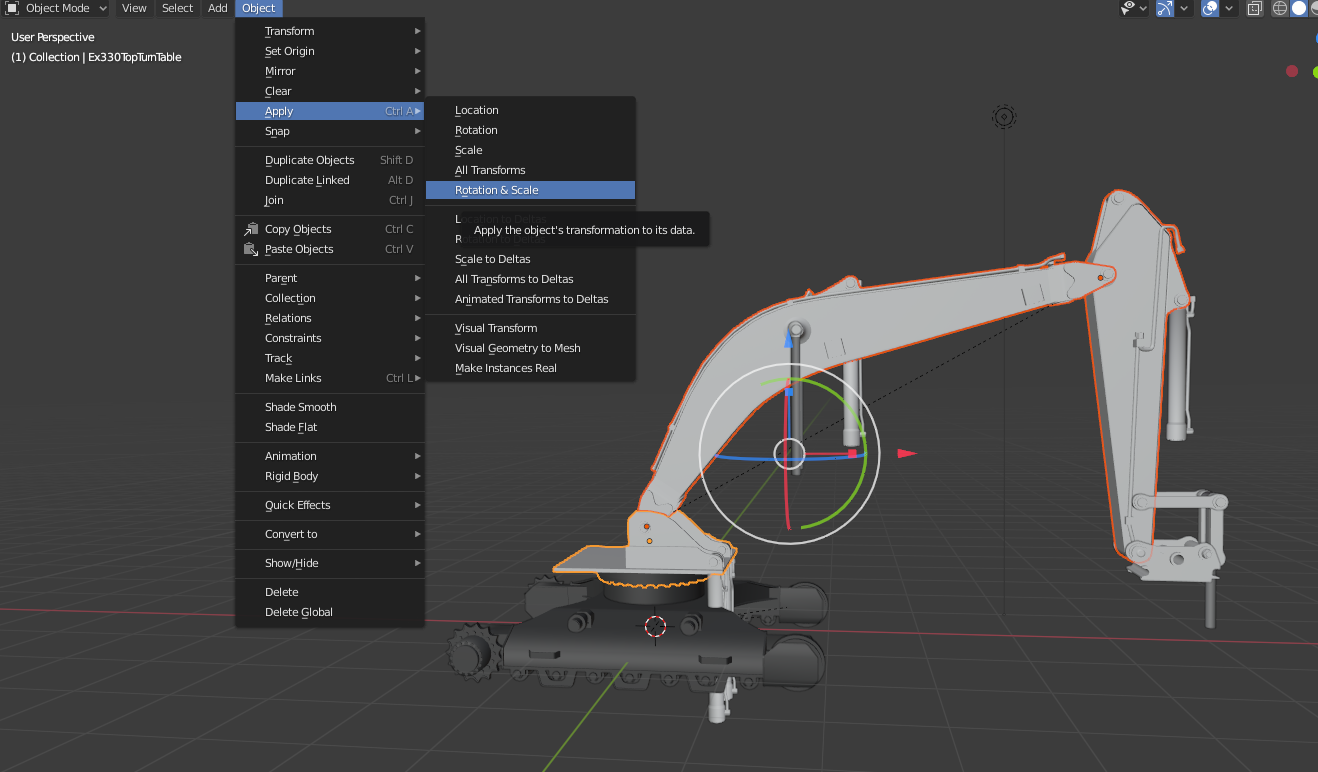
Last before Exporting remember to Apply Rotation and Scale, DO NOT APPLY LOCATION! this will f up all your centers!
Exporting
This is pretty simple, Export as Fbx to your texturing software, Bada bing bada booom almost done!
Texturing
Other Tutorials
If your new to blender we recomend watching this series to learn blender:
- Blender Beginner Tutorial - Part 1: https://www.youtube.com/watch?v=TPrnSACiTJ4
- Blender Beginner Tutorial - Part 2: https://www.youtube.com/watch?v=RaT-uG5wgUw&t=2s
- Blender Beginner Tutorial - Part 3: https://www.youtube.com/watch?v=R2qjqqfkH6E
- Blender Beginner Tutorial - Part 4: https://www.youtube.com/watch?v=jmSgsaNSQ6s
- Blender Beginner Tutorial - Part 5: https://www.youtube.com/watch?v=6OTX3ZdYvEA
- Blender Beginner Tutorial - Part 6: https://www.youtube.com/watch?v=ZTxBrjN1ugA
- Blender Beginner Tutorial - Part 7: https://www.youtube.com/watch?v=5lr8QnR5WWU
Texturing in Blender
- Blender UV Mapping Tutorial: https://www.youtube.com/watch?v=XeBUfMKKZDo
- Blender Surface Texture Painting - Part 1: https://www.youtube.com/watch?v=GxUsg4x3iz8
- Blender Surface Texture Painting - Part 2: https://www.youtube.com/watch?v=4ibLLmoh3oY
- Blender Surface Texture Painting - Part 3: https://www.youtube.com/watch?v=hEH8TsGM78o
- Blender Surface Texture Painting - Part 4: https://www.youtube.com/watch?v=XJ__9yH5IPc
